

I have been on the search for the perfect summer dress with no success. Nothing has really spoken to me as something I want to add to my closet.


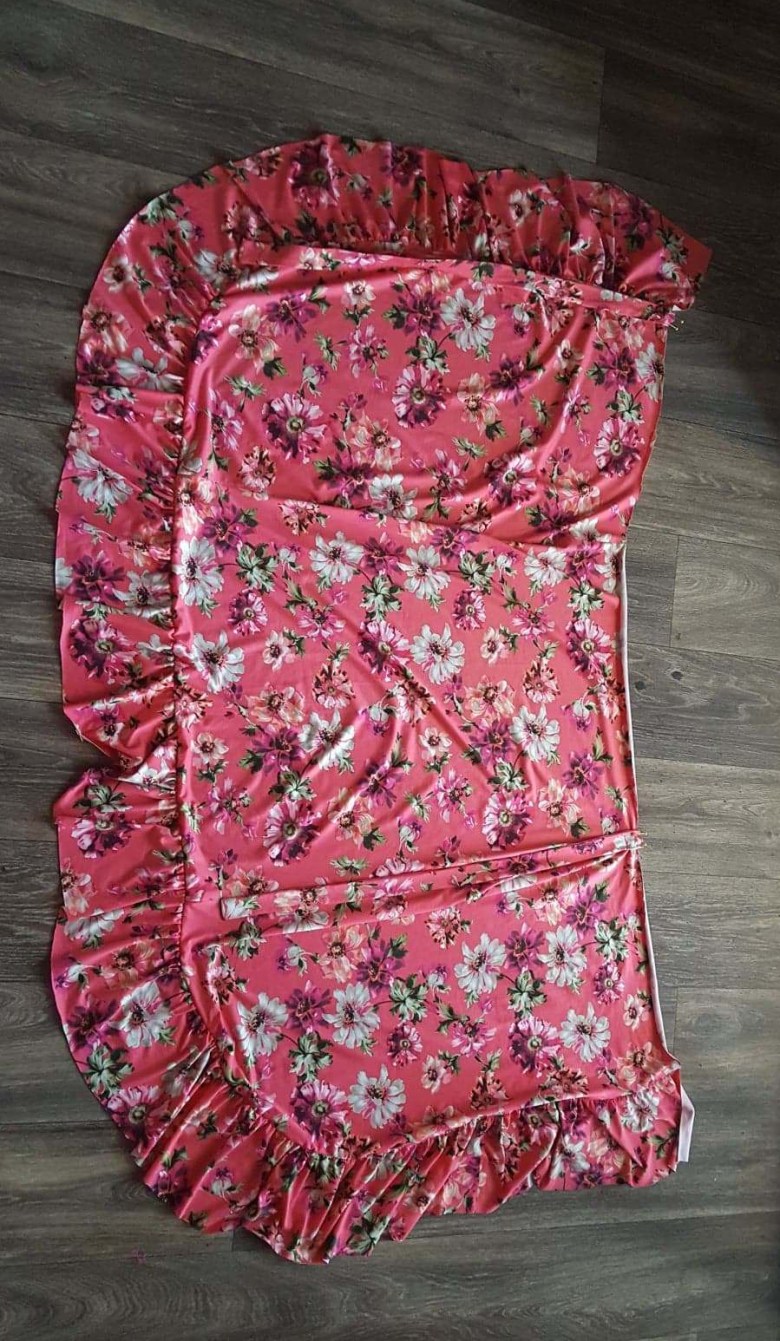
Then, As I was browsing through Jo-Ann’s a few weeks ago, this bright pink floral fabric just called my name. After much debate, I decided to make it into a wrap dress.
Anytime I decide to make a dress (or any clothing in general) I like to do a sketch of how I would like the dress to come out so I can see where the seams would be, how long I want it, and if there is anything I would like to add on from my original thoughts.
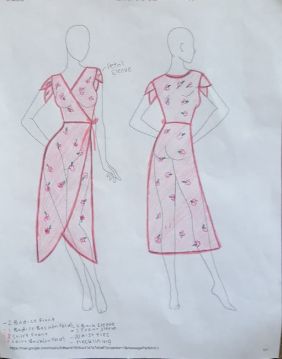
I made my pattern by using clothing I already owned and tracing it, then I would make adjustments to get the results I wanted. I bought 2 yards of fabric and had some left over that I ended up using to make a ruffle for the skirt portion. Depending on how long or short you want your skirt to be will determine more or less the amount of fabric you’ll need (always get extra fabric in case you mess up or would like to add-on later). I ended up having my dress be too small because I didn’t calculate my chest area correctly (does anyone else have this problem?). So, to adjust, I added two panels to the sides of the dress giving me the space I needed to cover up the way I wanted.
Step by Step Process:
Step 1. Cut fabric, you’ll need: 2 bodice fronts, 1 bodice back, 2 skirt fronts, 1 skirt back, 4 pieces for the sleeve, 2 pieces front neckline, 1 piece back necking, 2 wrap ties. OPTION FOR RUFFLES: cut out 6-inch strands with my leftover fabric.

Step 2. Sew bodice fronts and bodice backs right sides together at the shoulder seams. Same for the neckline pieces.

Step 3. Attach the neckline to the bodice right sides together and topstitch so it stays in place.

Step 4. Sew bodice fronts and bodice back right sides together at the side seams (Mine has the adjustment I had to make for it fit me properly).

Step 5. Sew skirt fronts and skirt back right sides together at the side seams.

Step 6. Hem skirt or OPTION FOR RUFFLES: Sew the 6-inch strands right sides together to get one really long piece, the longer you can get it the more ruffles you can get. Sew a basting stitch through the whole long strand, but don’t backstitch because you will be pulling at the thread to get the gathered effect you want and if you do then the thread can’t be pulled. Once you have it the way you like, start pinning it to the skirt right sides together with the gathered side pinned to the skirt. Remember to change your stitch back to normal, and sew the ruffle into the skirt. I finished the raw edges with a zigzag stitch.
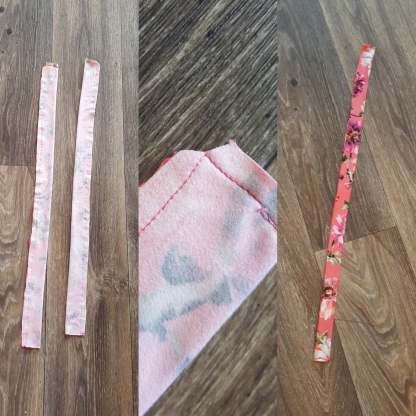
Step 7. Fold wrap ties in half right sides together and sew along 2 of the edges leaving one unsewn so that you can flip the tube. Before flipping make sure to clip the corner so that there’s less bulk and it will lay flat.
Step 8. Decide which side you want the dress to be tied on, and pin the ties in place on the skirt, with the unsewn edge on the side that is to be sewn.

Step 9. Pin the bodice to the skirt and sew the skirt and bodice right sides together.
Step 10. Sew in sleeves. I decided on making my sleeves petal sleeves. So first I sewed each pair right sides together. Then I pinned the seam on the sleeve to the armhole seam on the dress. From there I pinned each side of the petal sleeve to the rest of the armhole. Making sure that the overlap was the same on both sides. I then stitched it in place. I finished the raw edge with a zigzag stitch.
My sewing professor used to say all the time, the difference between Nordstrom & Wal-Mart is pressing. So press every stitch as you make it. You’ll see the difference! I also finished the seams by folding the seam in half and sewing that down.
I was so nervous at first to make the first cut into the fabric, it’s been awhile since I’ve made something completely from scratch but once I got past the initial fear I couldn’t wait to see how it would turn out. Despite the miscalculations and adjustments, I went through, I got to say, I absolutely love the way this dress turned out!


How did you learn to sew? Are you self taught? The dress looks great!
LikeLike
My mom tried teaching me when I was a kid, but somehow I always ended up getting stuck to the machine. But when I was in college I took a sewing class that helped me get down some of the basics, now I just wing it!
LikeLike
Awesome 👏
Sent from my iPhone
>
LikeLiked by 1 person
Thank you! ☺️
LikeLike